How to Create Compost and Its Benefits
National CSA Directory October 23, 2018
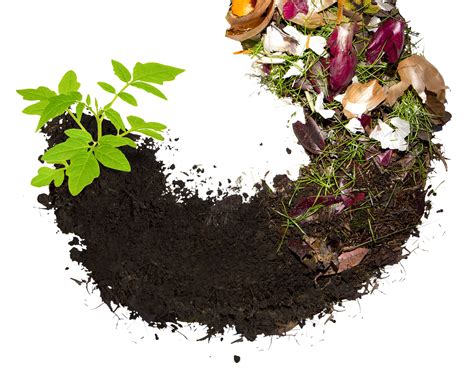
Compost is a decaying living matter that can be used as fertilizer to grow plants. Compost comes from decaying organic material that has been classified as ‘waste’. This includes discarded foodstuffs, dead animals and even plants. Many people use the terms ‘compost’ and ‘fertilizer’ interchangeably. The two are, however, different. Compost nourishes the soil whereas fertilizer nourishes the plant.
There are many benefits of using compost to both the garden as well as the environment. Adopting the use of compost is a great way of minimizing waste produced in the home. Instead of throwing away uneaten foods or foods that have gone bad, these can be put to good use by putting them in a compost bin and turning them into compost.
Compost also improves the nutrient content of the soil. Decaying organic matter leads to a thriving soil food web. The soil food web ranges from microorganisms like fungi and bacteria to macro-organisms like beetles and earthworms. While these may seem like unwanted guests to your garden, they are essential to providing good soil for plants. In addition to this food web, compost also adds great natural nutrients to the soil. A study done by the University of Illinois showed that plants growing in soils that have been treated with compost were more resistant to pests than those grown in soil lacking compost.
Materials to Be Used in Compost
Most of the contents that can be used to make compost can be obtained from the kitchen, the dining table, the house at large or even the garden itself. I like to go to the local pumpkin patch near me in the fall and stock up for the winter when the vegetable waste is scarce. A good mixture of both brown and green components can go into the compost bin. The following are some of the most commonly used materials in making compost:- brush trimmings, grass clippings, leaves, dry dog and/ or cat food, manure, old wine, old spices and herbs, and non-animal foodstuffs. Non-animal foodstuffs include vegetables, bread, tea leaves, and peelings among many others.
What Not to Put in Compost
Many amateur gardeners make the mistake of composting every organic matter that they can put their hands on. While this is key in reducing the amount of waste in the home, it can lead to the production of low-quality compost. Not everything that decays should be used in composting. The good news, however, is that the good stuff to put in your compost is a lot more than the bad stuff. What you should avoid putting in your compost includes:- poop from carnivorous animals (like dogs and cats); fish and meat scraps (their
smell attracts rodents like rats); labels found on vegetables and fruits; ash from coal fire; sawdust obtained from treated wood; manufactured fertilizer; large branches and peelings from onions and citrus fruits.
Here is a pro-tip in making the best compost – have a brown to green ratio of 2:1. The brown matter is usually rich in carbon. It includes stuff like fallen, dry leaves and hay or chopped straw. Green matter, on the other hand, is rich in nitrogen. Green matter includes such things as legume debris, clover clippings, and even grass.
Cold Composting vs. Hot Composting
The two main techniques used in making compost are cold composting and hot composting. Cold composting is the older method. It demands very little effort from the gardener but it takes longer to get the compost. Anywhere between 6 and 12 months is considered a normal time to get manure from cold composting. In some extreme cases, it takes even two years. The time it takes depends on the size of the components in the pile. The smaller the particles the faster the decomposition. All you have to do in cold composting is to put all the components in one big pile and let nature take its course in breaking them down.
Hot composting, on the other hand, is a more energy consuming process but one that gives you the results in a shorter time. In hot composting, the materials to be decomposed must be moist (not wet). In hot composting, microbial activity is at its maximum, causing decomposition at a much faster rate. The compost pit should be placed out in the sun. Make sure all your components are finely chopped down to increase the decomposition speed. You can do this by running the heap over with a lawnmower. To maintain a hot pile, monitor the temperature of the soil as well as the moisture and turn the heap regularly. The optimal temperature is between 130 and 140 degrees Fahrenheit. Doing this regularly will have your compost ready in about 3 weeks.
Vermicomposting is a method of making compost that uses a variety of worms to speed up the process. The most commonly used worm species are earthworms, white worms, and red wigglers. The end product of the compost pile sped up by earthworms is called vermicast. Vermicast has been shown to contain a high level of nutrients and a very low level of contaminants.
The six steps below will guide you on how to make a vermicompost bin:
1. Get a bin. You can do this by reusing an old fish tank or an old dresser. The ideal size is 16″ x 24″ x 8″. Make sure its clean of any residue. For a wooden bin, line the bottom with plastic material to prevent seepage of liquids.
2. Prepare the bedding using moist newspaper as opposed to soil. The newspaper strips provide more food, water and air for the decomposing red worms.
3. Weigh the worms to know how many they are before adding them to the compost pit. Knowing their volume is important for record keeping and knowing how much food will be needed to feed them.
4. Put food scraps beneath the bedding. Cut them into small pieces and measure the amount of food so that it is proportional to the number of worms.
5. Take a whole sheet of dry newspaper and put it on top of the pile. This is important in maintaining moisture balance.
6. Finally, cover the bin and look for a suitable place to put it.
Making Compost Tea
Compost tea is a liquid suspension that is made by steeping compost in water. Its two main functions are as fertilizer and warding off plant diseases.
Below are the steps necessary for making compost tea:
1. Obtain the materials for making the brew and for filtering it. The materials for brewing include water, a shovel, an air pump, a hose for the air pump, a water-tight container, unsulfured molasses and the compost itself. For filtering, you will need a piece of cloth, a wire mesh
strainer, and another bucket.
2. Put some water into the bucket and put in the molasses as well. Add some more water but do not fill to the brim. There will be fermentation and you do not want the mixture to spill over. Stir gently.
3. The next step is to set up the air pump. Push the tubing all the way to the bottom. This pumping of air will produce a large bubble in the mixture. Let this mixture brew for between one and two days.
4. Finally, filter out the compost tea, use the mesh to gently pour the mixture into another clean bucket.